Thursday, 30 June 2011

Laptop case

Well, this is a strange post to write. I lovingly made this case for one of the most important things in my life, the recipient of hours of my time and waking thoughts: my dear laptop. 


The second most expensive thing I have ever bought even with the staff discount my friend got me. But my word, it was worth it. I decided to make it a cover as I simply could not bear the thought of any little blemishes on its perfect body.


I made it a couple of weeks ago but did not have a chance to write a post about it. Since then we have been parted. And things have changed. I have been on holiday, camping and travelling and have not had time for my sweetheart. It has been so nice to get sun baked, eat a lot of sausages, drink surprisingly potent hot chocolate and sleep under nothing but stars and canvas. And be unplugged.


So it feels odd to be writing this ode to my laptop now. I know it is only temporary, an evening or two and we'll rediscover our spark. We just need time.


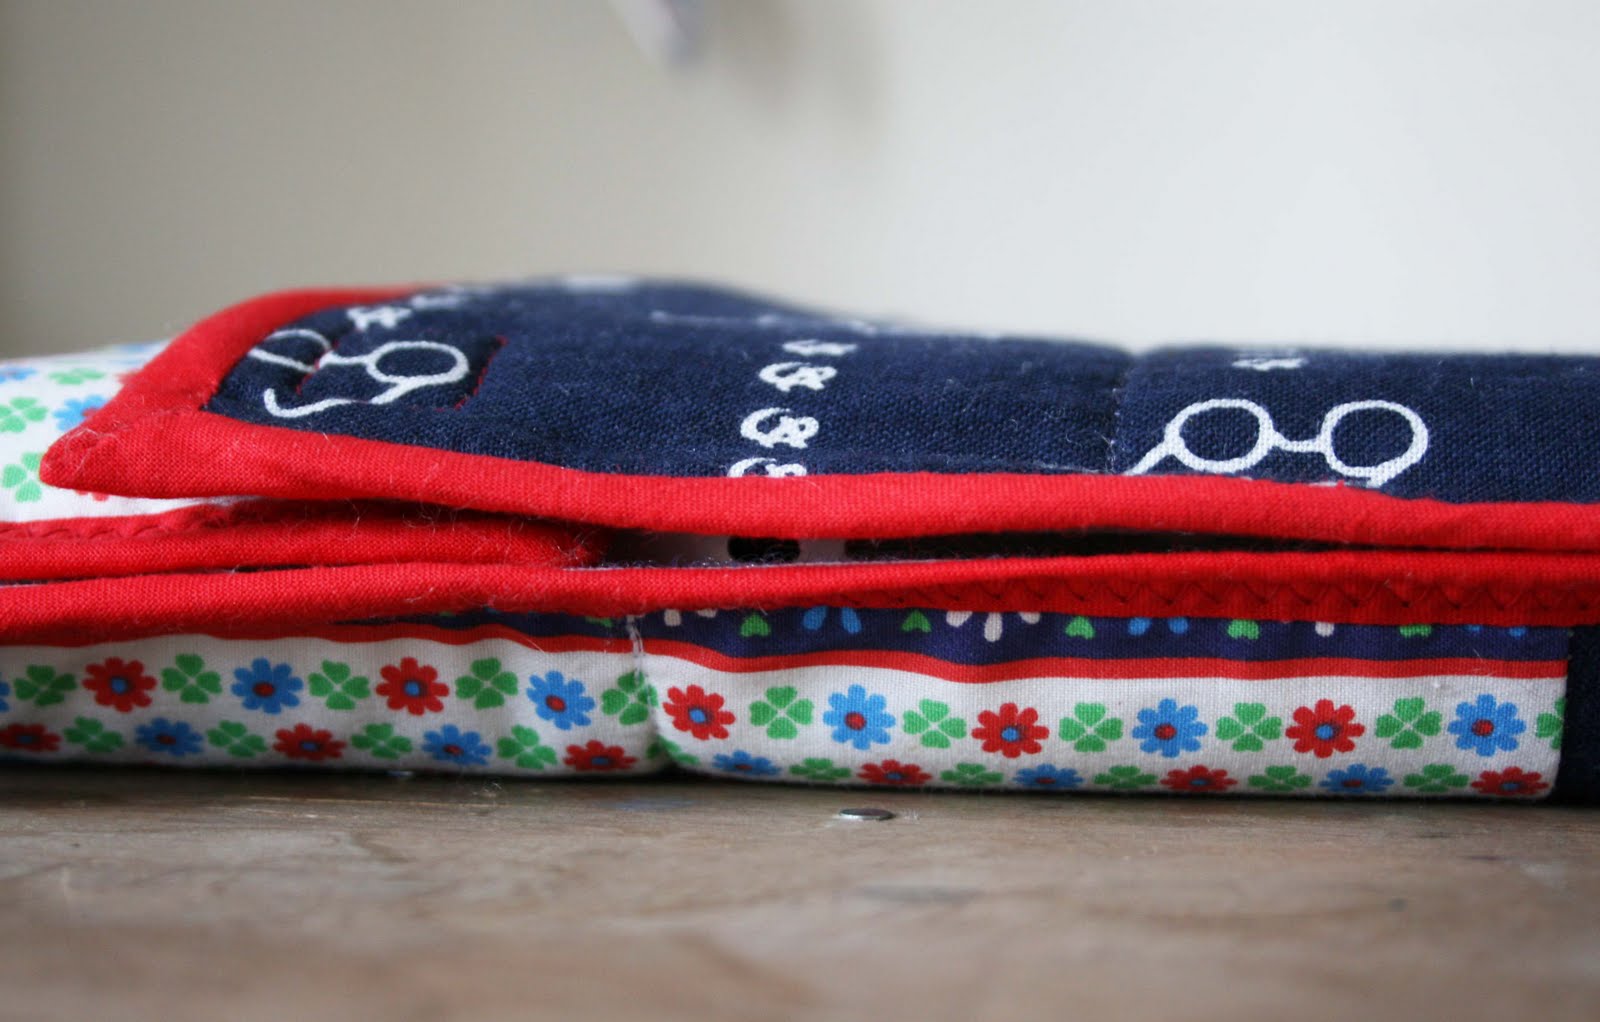
To make the cover I used this tenugui from Japan. I love the way it has been dyed, the thick softness of the cotton and the deep beautiful blue. I also thought the glasses print had a great studious, ocular feel. 


It was not big enough so I added some more cotton from my stash. The floral print came from here and worked perfectly. I used some old curtain lining for the padding, the really thick kind, essentially a plain blanket. This gave the cover enough padding and protection.


To finish it off I sewed the whole together and used red bias binding for the edges. For once I used the invisible hand sewing technique for binding, and I loved it. I had forgotten what a lovely way hand sewing is to spend a few minutes of your life. I did it the way shown in  sewing books: you sew it back to front on the machine on one side, then flip it over and use tiny invisible hand stitches on the other side.


Amy Karol has a great tutorial for the all machine way here, if the project had been any bigger I would have used that method.

Some well-placed velcro, a few zig zag stitches and it was done. What would have been great is if I had used red velcro, but there just wasn't the time.


But for now I am feeling happily analogue, grimy and brown. 


As long as I ignore the perfect storm of dirty washing, unpacking, empty fridge and tired children brewing downstairs.


Friday, 10 June 2011

Crochet tunic


Finally, finally. I mean, I wasn't in a hurry, but still. That took ages. I think I first mentioned this project back here in late January.


And really, I think the only way is to see such projects is long term. I was going to be the boss of this tunic, not the other way round. 


And that is how it went, mostly. Car journeys, episodes of 'The Killing' (not easy to crochet with subtitles), the odd row here and there and before you know it... But, it still took ages. And frankly, I did get bored. A lot of black, a lot of the same two rows repeating over and over and over.


I prefer crocheting for things or small people, I have learned this about myself. I will wear this though, just as soon as the temperature stops being 25 degrees.

I don't wish to sound down on it, I really think crochet is magical mystical stuff, and still much faster than knitting, but the repetition of it crossed over from meditative to monotonous


When it was finished I blocked it out as per the tutorial on Alicia Paulson's blog. I don't have a blocking board so I wrapped a towel around my cutting mat, it was fine. 


I used Patons Diploma Gold DK, it was 55% wool, the rest nylon, which was a strange choice I suppose but I wanted it to hang really nicely. 


The pattern was from Rowan Summer Crochet, the Sardinia top, I added a few rows to make it more tunic-y. I have posted it all up on my Ravelry page.


Never again. Back to small, pretty things.


Friday, 3 June 2011

Going back to my roots

There was a time, not so long ago, when hardly a day went by without a pair of these in my hands:


Tile nippers and adhesive: these were my friends.


Not so much on pots, mainly on walls. In and around London but also in Chandigarh and around the world, being a mosaic artist was my day job for a good few years, and a very nice one it was too.

I designed them, made them, taught others how to make them. I earned a living from this gig.

So when a friend broke her favourite plate when moving house, she came to me with the pieces, and a new commission was born. 


It was just like riding a bike. I remembered the dusty fun of this bit:


And the magic of this bit:


And the 'ta-da!' of this bit:


Irregular broken crockery calls for simple, so that is what I did. Making a jigsaw without a picture, finding backstamps and stories.


I thought a lot about this mosaic hero of mine. And this one.


Mmm... what next?


Tuesday, 24 May 2011

All-weather multiway literary playtent

A large project has been completed. Sound your trumpets for: the playtent. 


This lovely playtent (second row down) from Heather Ross' 'Weekend Sewing' inspired me, I talked more about this beautiful book in this post. Also, like most human beings, I love Shirley Hughes and there is the part in 'Alfie Goes Camping' where his mum throws a sheet over the washing-line to make a tent. 


But, this is England. What happens for the 300 days a year when it is too cold or wet? Well, there was this almost too-brilliant Etsy seamstress. And this more minimalist take on the table tent. I loved this concept: a little kitchen den for rainy days. But this would require us to have a table free of clutter and dried bits of cereal. And that would be an impossibility.


So. It had to be able to go around a table but not over a table. It also needed to go over a washing line, a clothes drier, and maybe even hammock-style between two trees. In short, it had to be multiway


Technical drawings began. I knew the key to unlocking the design conundrum lay in the extensive use of velcro. It usually does. I came up with two identical rectangles, each the size and shape of our kitchen tabletop edge and down to the floor. 


Each piece would have a window with curtains that would be able to close for privacy. By sewing velcro along the long and short sides of the rectangle the tent could be short sides or long sides together.


But, what about the curtains? This caused me no end of scratching my head. All fine when in table mode, but what about washing-line mode? I did not want awkwardly flapping curtains. The lightbulb moment came when I decided to make them sewn permanently down onto a thin strip of velcro, but with tie-backs for opening (above). That way they could be placed along the short or long side of the window, or removed all together.


Above shows the eyelets I added in the corners for pegging it down when in tent-mode. I realised too late that I should have reinforced the corners before putting the eyelets in.


This Elmer fabric was the ideal weight, a little canvassy and heavy. And crucially, it had Elmer on it. 


Gingham ribbon helped to trim the windows and make the tie-backs. The drunken advice of Emma, Jackie and Lucy during a sewing evening where no sewing at all got done helped with this bit.


And that was it really. A space - I hope - for playing, plotting, reading and dreaming. A room of their own. 


Shirley Hughes and Virginia Woolf: a most literary multiway playtent.


Friday, 13 May 2011

Late spring coverlet


My friend has just had a little baby boy, such a nice time of year for it: you just put a rug down and let the chaos reign. 


Just over a year ago I had a baby at this time of year too, and I found a coverlet very handy. Not a blanket or a quilt - it was too warm for those - but a coverlet. A sheet on one side and a quilt top on the other, so it was kind of a lined sheet. 


Now it is a little rug to sit on. I decided to make one for the new little boy and try out some fabric combinations I had had my eye on.


I cut the squares quite precisely for once and used the overlocker (love) to join them into strips, then the strips to each other. It was so quick and painless that I am not sure it earns the right to be called patchwork. Patchwork to me implies a level of endurance and suffering. 


I added some quilting knots, another first, in red embroidery floss. This kept top and bottom together. A bit of home made bias binding, a strip of some nice cotton lace and it all came together with amazing ease.


I hope he likes it, and that it fosters a love of gingham, Snoopy, geese, trees, apples, Miffy, polka dots and all life's good things.


a year above the shop

a year above the shop